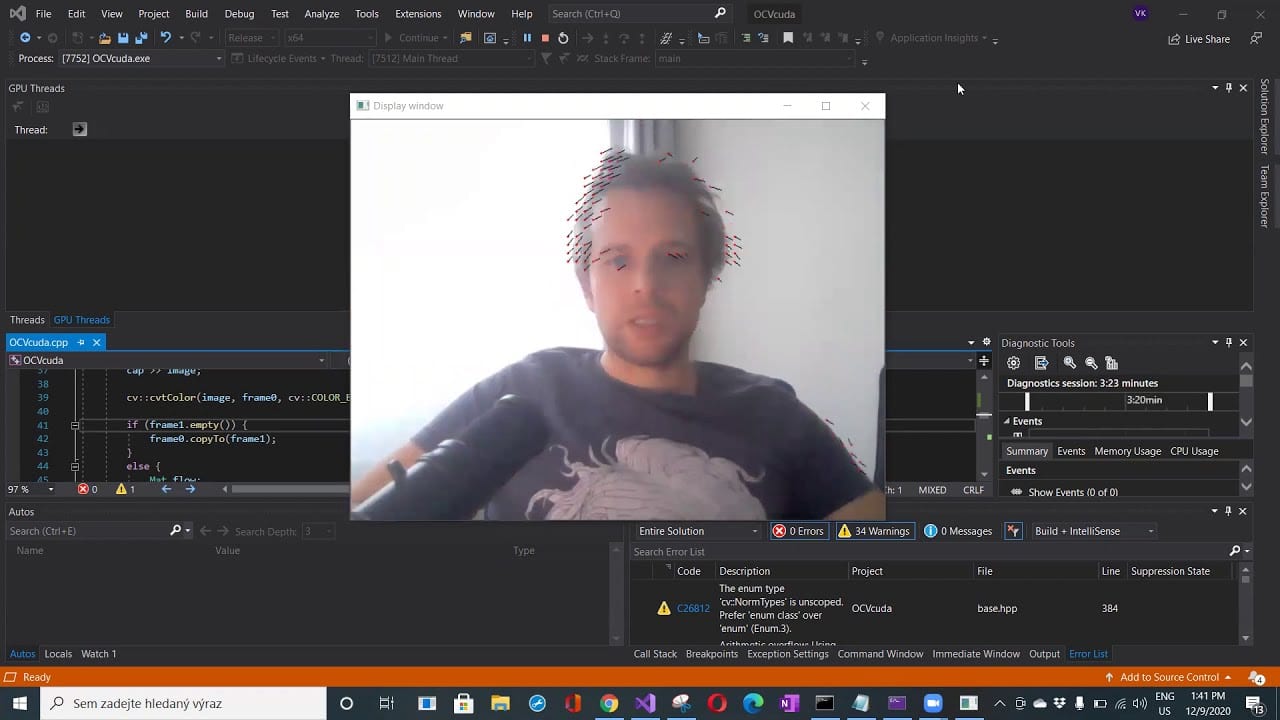
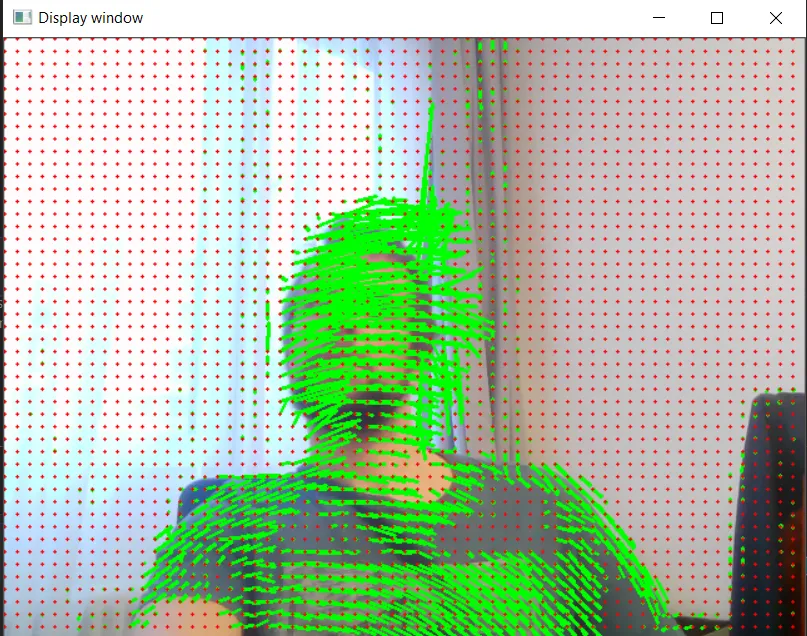
This OpenCV tutorial is a very simple code example of GPU Cuda optical flow in OpenCV written in c++. The configuration of the project, code, and explanation are included for farneback Optical Flow method. Farneback algorithm is a dense method that is used to process all the pixels in the given image. The dense methods are slower but more accurate as all the pixels of the image are processed. In the following example, I am displaying just a few pixes based on a grid. I am not displaying all the pixes. In the opposite to dense method the sparse method like Lucas Kanade using just a selected subset of pixels. They are faster. Both methods have specific applications. Lucas-Kanade is widely used in tracking. The farneback can be used for the analysis of more complex movement in image scene and furder segmentation based on these changes. As dense methods are slightly slower, the GPU and Cuda implementation can lead to great performance improvements to calculate optical flow for all pixels of your image.
Content cuda::FarnebackOpticalFlow tutorial
- Requirements to compile and run code
- Brief description of how to compile OpenCV with Cuda
- Visual Studio Opencv Cuda Project configuration
- FarnebackOpticalFlow
- Brief description of code
- Full code
Prerequisities cuda::FarnebackOpticalFlow
- NVIDIA CUDA Toolkit I am using version 11
- Visual Studio 2019
- Opencv 4.5 build from source with Cuda
Build OpenCV with Cuda contrib
The tutorial to compile Opencv with Cuda and contribution library is here. You can exclude GStreamer.
Visual studio OpenCV Cuda configuration
The following examples show the exact setting for the Visual Studio project. Additionally to normal OpenCV configuration. You have to point to a few locations. Include directory …CUDA\v11.0\include and additional library dependencies …CUDA\v11.0\x64. The last thing is to add OpenCV Cuda specific libs to additional dependencies. Just follow these pictures:

Visual studio include directory OpenCV Cuda

Visual studio additional library directories OpenCV Cuda
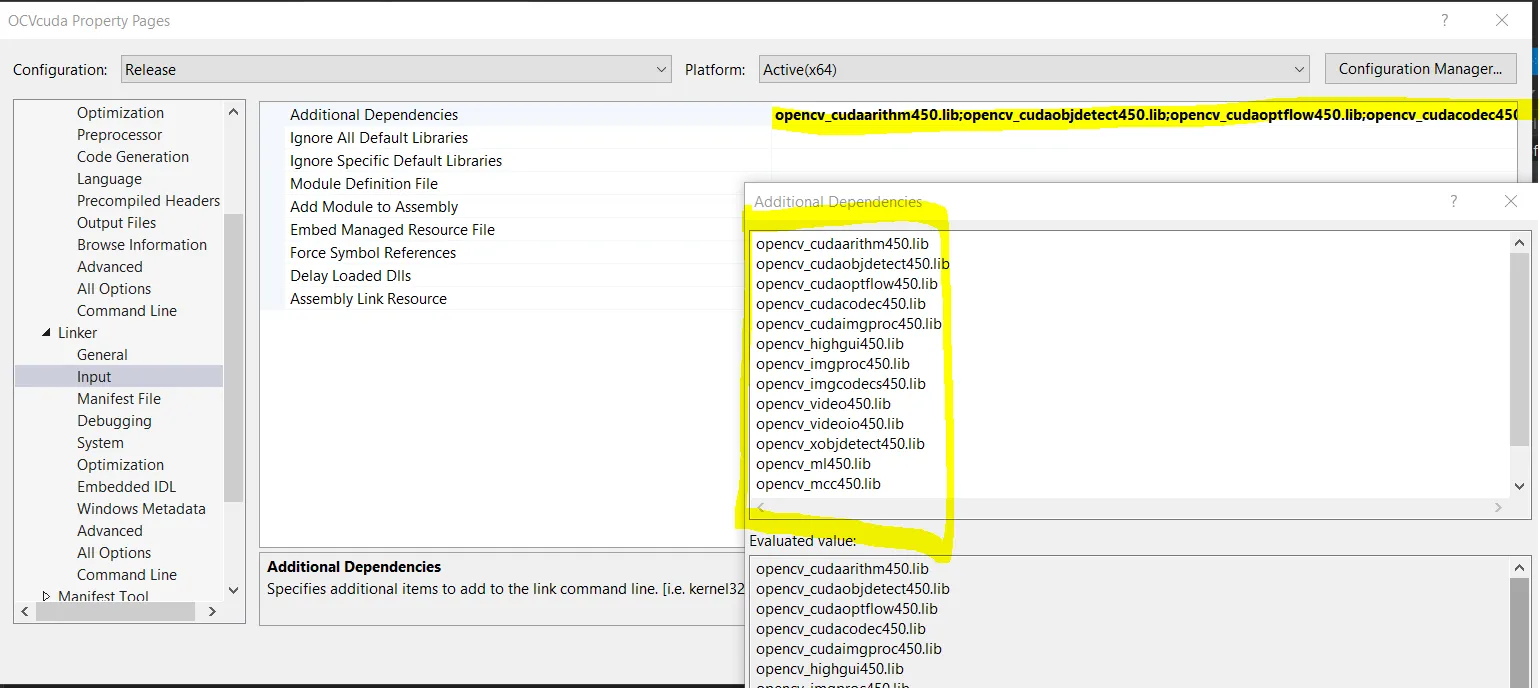
Visual studio additional dependencies OpenCV Cuda
cuda::FarnebackOpticalFlow class
The use of FarnebackOpticalFlow with default parameters is very simple and straightforward. The first step is the create a pointer to the FarnebackOpticalFlow object. The Ptr in OpenCV is C++11 shared pointer. I believe that the most important advantage of this pointer to mention is automatic cleanup.
Ptr<``cuda``::FarnebackOpticalFlow> farn = cuda``::``FarnebackOpticalFlow``::``create
();The actual calculation of the optical flow is done in this calc function. The first parameter is GPU mat GpuImg0 for the previous image, the second GpuImg1 is for the actual image and the flow is GpuMat, where to put the result. The calculated optical flow based on the difference between GpuImg0 and GpuImg1; farn``->``calc``(GpuImg0, GpuImg1, gflow);
A short explanation of OpenCV optical flow code
The flow is simple. You have to capture at least two images to calculate flow. The first run of the for the look just fills the previous image frame1.
        if (frame1.empty()) {
            frame0.copyTo(frame1);
        }
If frame1 exists just calculate the flow and update the frame1 at the end of the loop.
frame0``.``copyTo``(frame1);
There is a few simple tricks in the code.
- The image must be gray
cv``::``cvtColor``(image, frame0, cv``::COLOR_BGR2GRAY);
- Create GpuMat from Mat
frame0``.``copyTo``(frame1);
- Put the result from gflow GpuMat to Mat flow.
gflow``.``download``(flow);
- Draw the results.
You can draw optical flow for each pixel. The original image will be lost. This is why, The x,y iterates on y +=+10 grid. The origin x,y and end point is x+Point2f x and y from the matrix flow. The * 5 is the gain to amplify the size of the flow line.
for (int y = 0; y < image.rows - 1; y += 10) {
   for (int x = 0; x < image.cols - 1; x += 10) {
   // get the flow from y, x position * 10 for better visibility
   const Point2f flowatxy = flow.at<Point2f>(y, x) * 5;
   // draw line at flow direction
   line(image, Point(x, y), Point(cvRound(x + flowatxy.x),
   cvRound(y + flowatxy.y)), Scalar(0, 255, 0), 2);
   // draw initial point          https://funvision.blogspot.com
   circle(image, Point(x, y), 1, Scalar(0, 0, 255), -1);
   }
}
FarnebackOpticalFlow tutorial code C++
// For tutorial go to
// https://funvision.blogspot.com
#include <iostream>
#include <fstream>
#include <opencv2/cudaimgproc.hpp>
#include <opencv2/core.hpp>
#include <opencv2/video.hpp>
#include <opencv2/imgproc/imgproc.hpp>
#include <opencv2/cudabgsegm.hpp>
#include <opencv2/cudaobjdetect.hpp>
#include <opencv2/cudaoptflow.hpp>
#include <opencv2/videoio.hpp>
#include <opencv2/highgui.hpp>
#include "opencv2/cudaarithm.hpp"
#include <omp.h>
#include <chrono>

using namespace std;
using namespace cv;
using namespace cv::cuda;

int main()
{

    Mat frame0;
    Mat frame1;
    // https://funvision.blogspot.com
    Ptr<cuda::FarnebackOpticalFlow> farn = cuda::FarnebackOpticalFlow::create();
    //Capture camera
    VideoCapture cap(0);

    for (;;) {
        Mat image;
        cap >> image;

        cv::cvtColor(image, frame0, cv::COLOR_BGR2GRAY);

        if (frame1.empty()) {
            frame0.copyTo(frame1);
        }
        else {
            Mat flow;
            //Put Mat into GpuMat
            GpuMat GpuImg0(frame0);
            GpuMat GpuImg1(frame1);
            //Prepare space for output
            GpuMat gflow(frame0.size(), CV_32FC2);
            // chrono time to calculate the the needed time to compute and
            // draw the optical flow result
            std::chrono::steady_clock::time_point begin =
                         std::chrono::steady_clock::now();
            // Calculate optical flow
            farn->calc(GpuImg0, GpuImg1, gflow);
            // GpuMat to Mat
            gflow.download(flow);

                for (int y = 0; y < image.rows - 1; y += 10) {
                    for (int x = 0; x < image.cols - 1; x += 10) {
                        // get the flow from y, x position * 10 for better visibility
                        const Point2f flowatxy = flow.at<Point2f>(y, x) * 5;
                        // draw line at flow direction
                        line(image, Point(x, y), Point(cvRound(x + flowatxy.x),
                         cvRound(y + flowatxy.y)), Scalar(0, 255, 0), 2);
                        // draw initial point  https://funvision.blogspot.com
                        circle(image, Point(x, y), 1, Scalar(0, 0, 255), -1);
                    }
                }

            // end - begin time to calculate compute farneback opt flow + draw
            std::chrono::steady_clock::time_point end = std::chrono::steady_clock::now();
            std::cout << "Time difference = " <<
              std::chrono::duration_cast<std::chrono::milliseconds>(end - begin).count()
               << "[ms]" << std::endl;
            // Display result  https://funvision.blogspot.com
            imshow("Display window", image);
            waitKey(25);
            // Save frame0 to frame1 to for next round
            // https://funvision.blogspot.com
            frame0.copyTo(frame1);
        }
    }
}