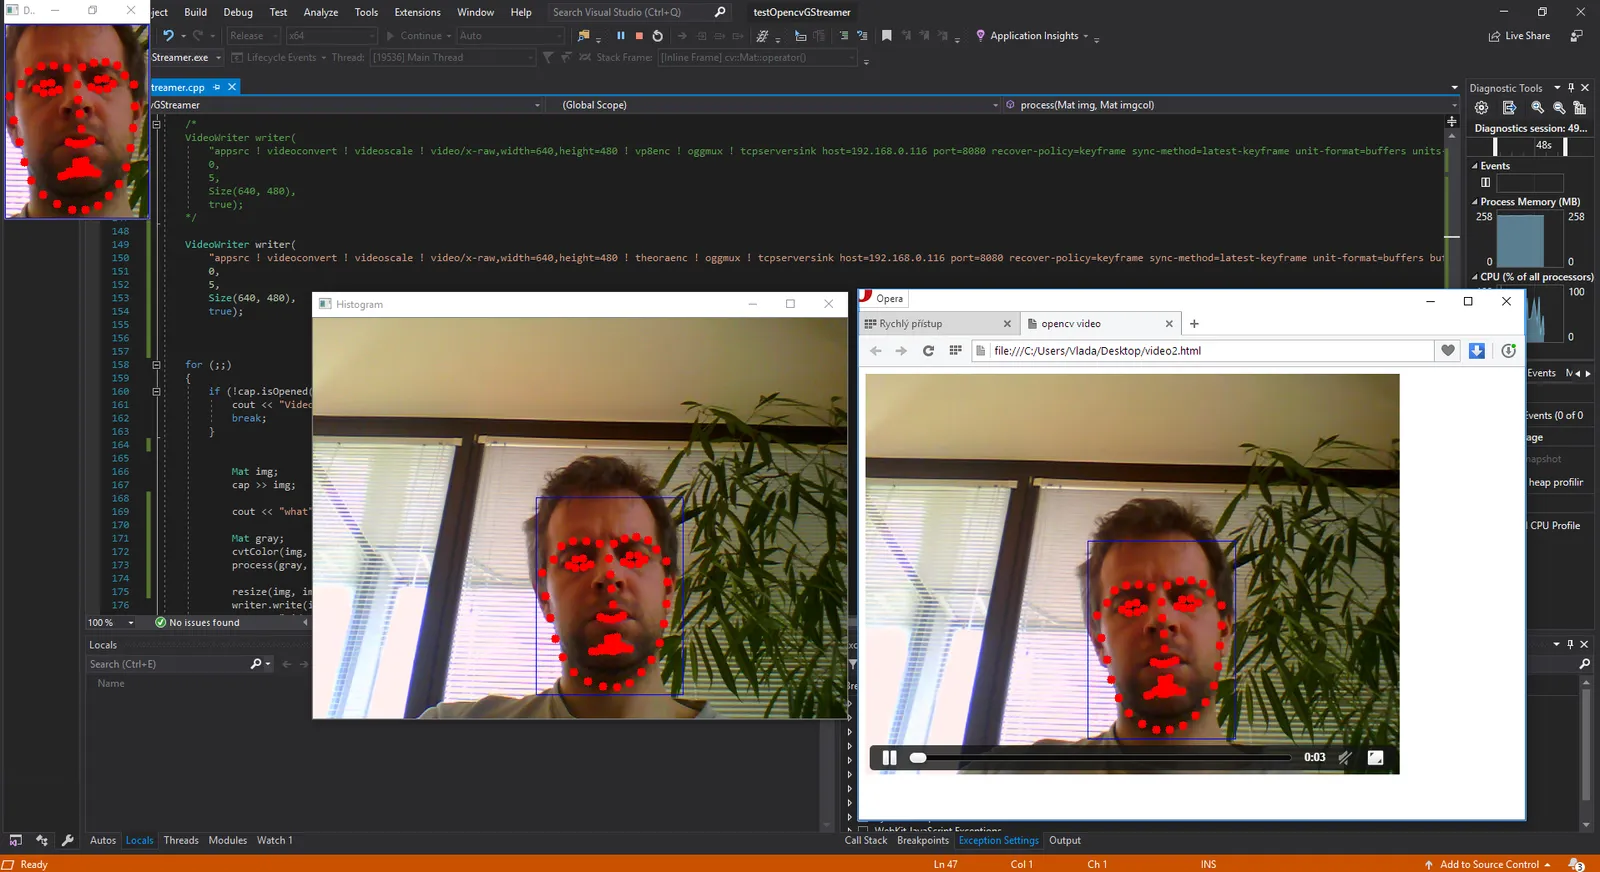
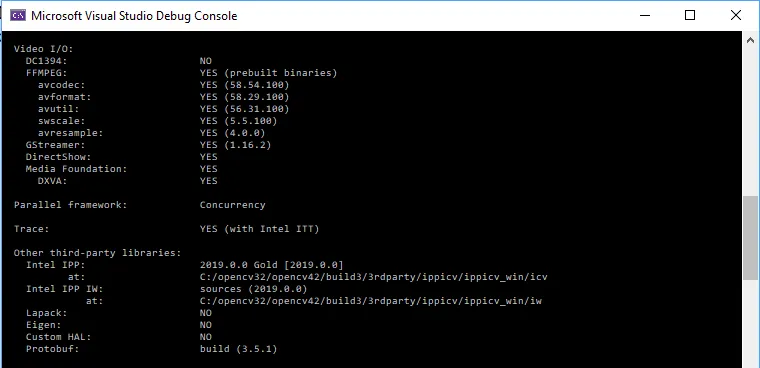
The goal of this tutorial is a simple step-by-step compilation of Opencv 4.2 with the contribution of extra modules with GStreamer as a bonus. The environment is Windows 10, Visual Studio 2019 C++ application. This took me almost one day to correct of CMake setting. The goal of this tutorial is: to compile a set of OpenCV libraries with GStreamer and FFmpeg on Windows. I focus mainly on GStreamer. It is a little bit more tricky. You will find the following information about your Opencv environment by compiling and running this simple code. The Opencv GStreamer is turned as YES. GStreamer gives you a great opportunity to stream OpenCV output video outside of your program, for example, a web application.
I recently compiled with OpenCV 4.4. The update at the end of the post.
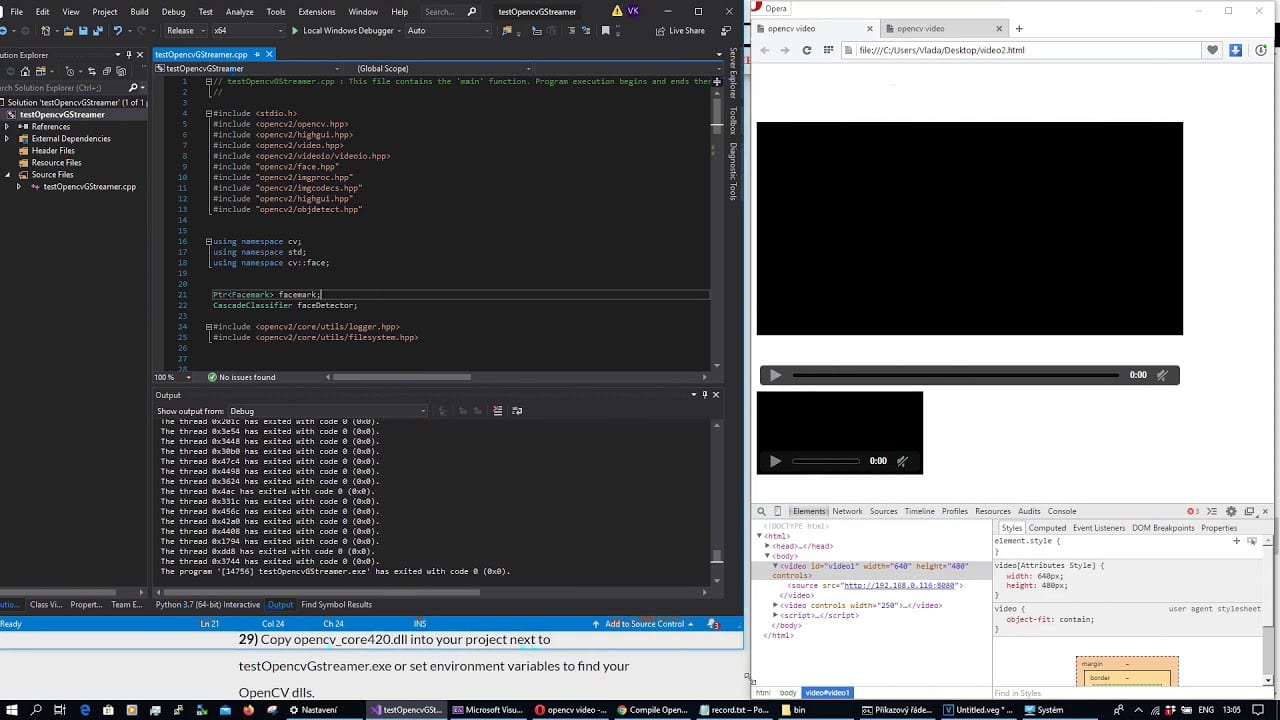
It is working!! wow, The working app and configuration in future tutorials.
#include <opencv2/opencv.hpp>
#include <iostream>
using namespace cv;
int main()
{
    std::cout << "Hello World!\n";
    std::cout << cv::getBuildInformation() << std::endl;
    std::getchar();
}
Environment for opencv under Windows compiled with extra modules and GStreamer
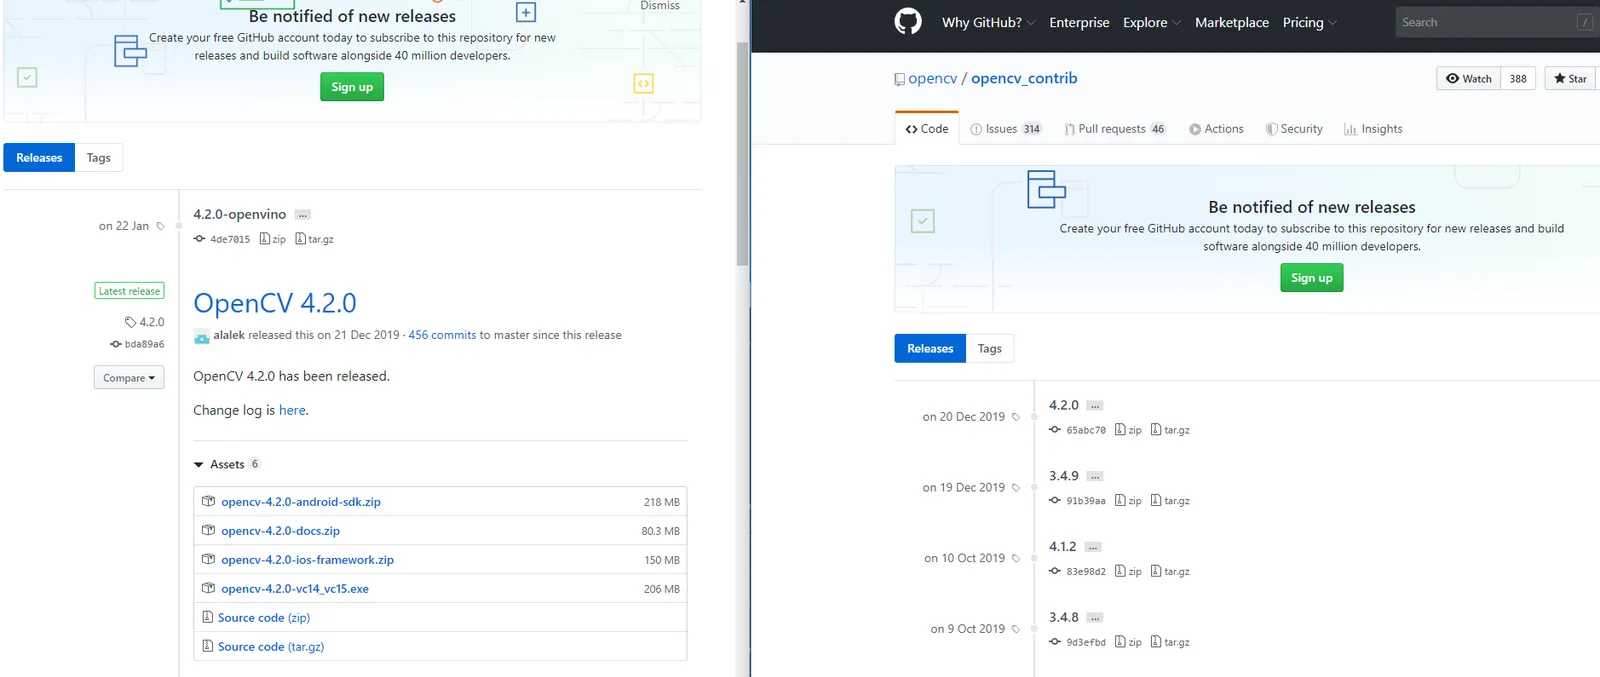
1) Get Opencv source. I would like to recommend taking the released version. I took the Opencv 4.2 source code zip on the left and released opencv_contrib 4.2 zip on the right.
https://github.com/opencv/opencv_contrib/releases
https://github.com/opencv/opencv/releases
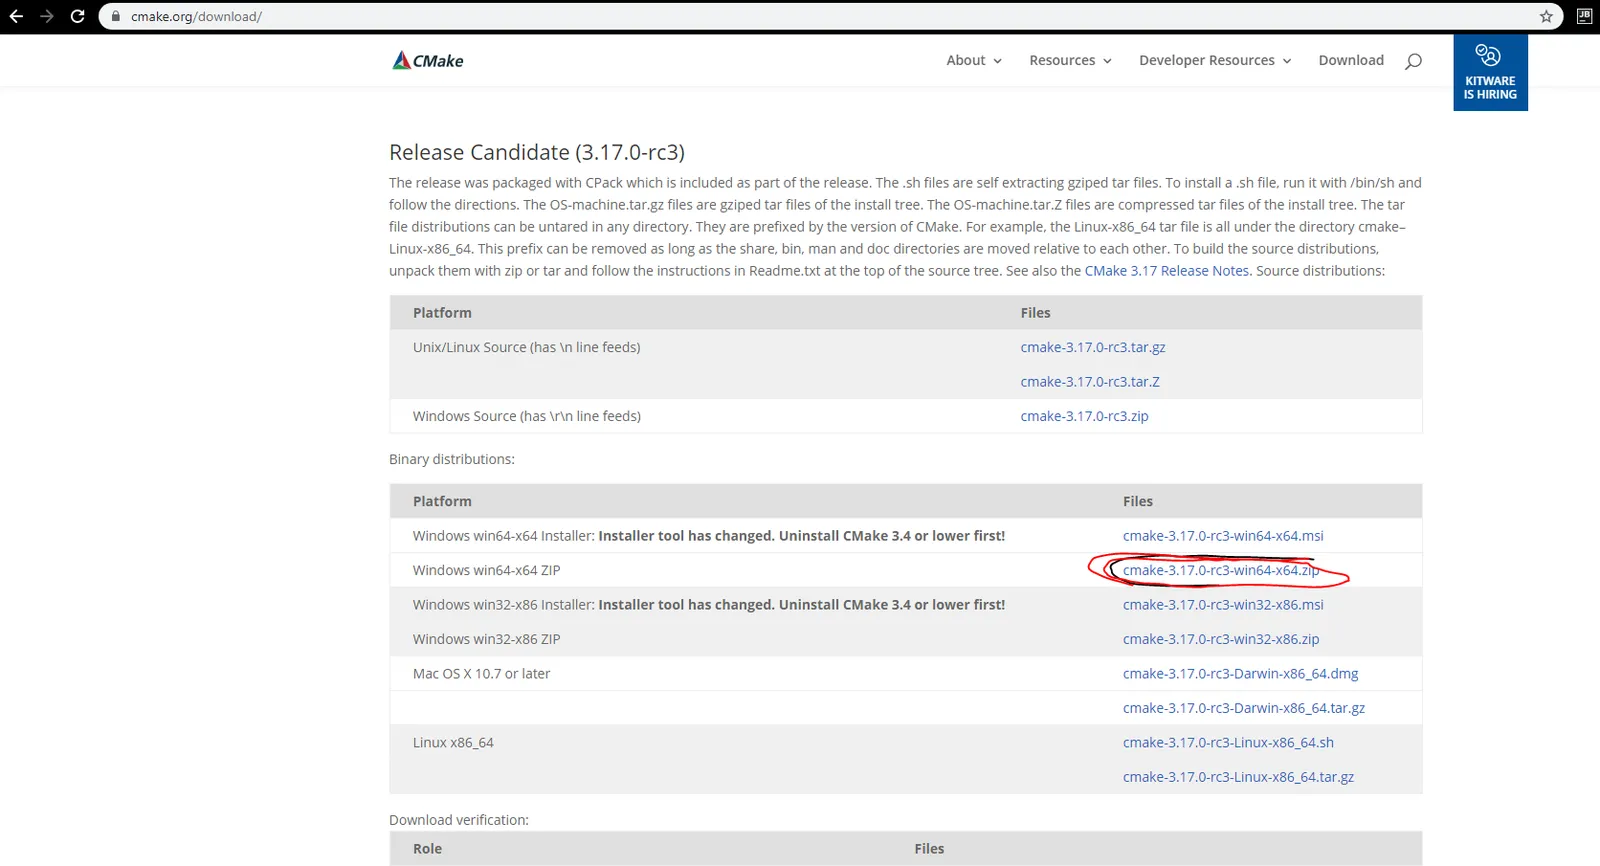
2) Get Cmake, I will recommend downloading the 3.17 release candidate 3 for 64-bit Windows. I failed with 3.16.5.
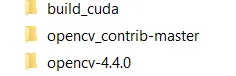
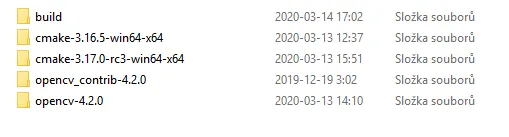
3) Extract OpenCV source into opencv-4.2.0
4) Extract OpenCV source into opencv_contrib-4.2.0
5) Extract Cmake for example into the same root folder https://cmake.org/download/
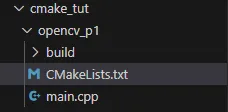
6) Create the empty build folder as you can see on the image with directories.
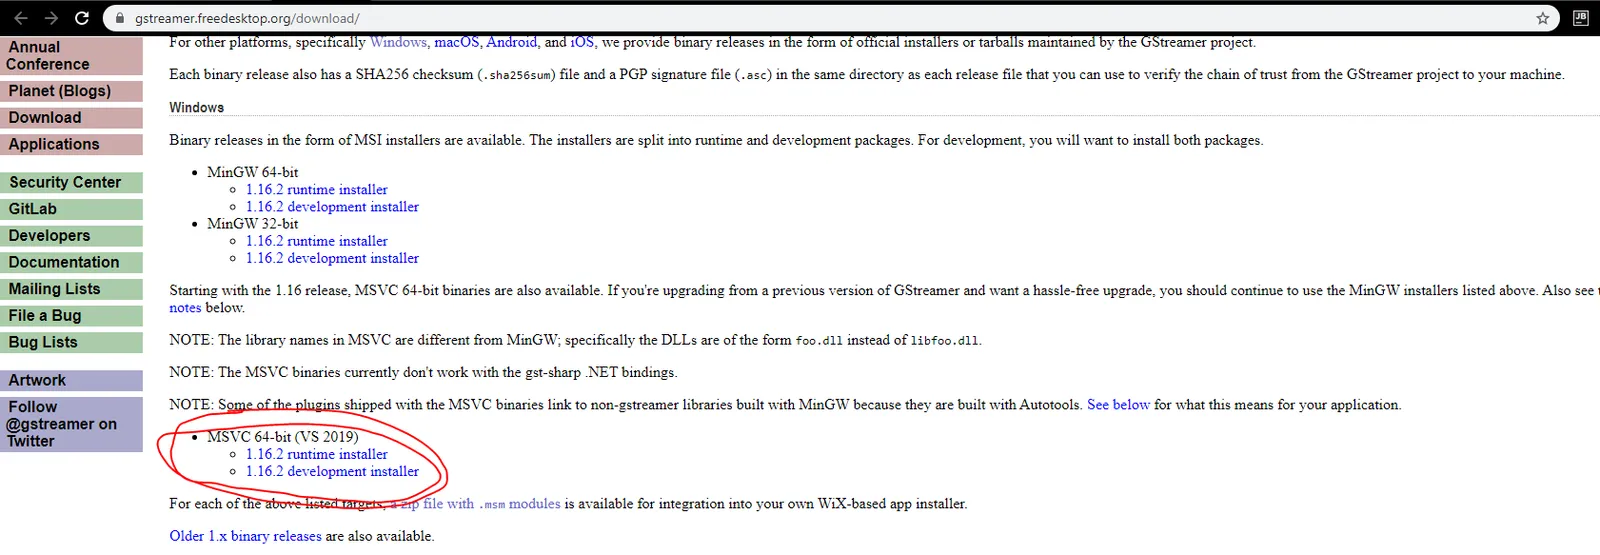
7) Download and install GStreamer from https://gstreamer.freedesktop.org/download/
MSVC 64-bit (VS 2019), You can download and install both, but the1.16.2 development installer for MSVC 64-bit (VS 2019) is important.
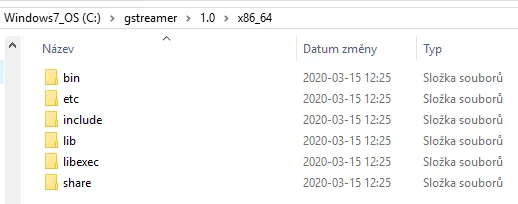
The result of the installation is this directory structure. It will be linked with our Cmake configuration later on.
8) Make sure you have Visual Studio 2019 with all C++ functionality
Configure Cmake to compile Opencv with GStreamer on Windows
I have a problem with this for a long time. I installed OpenCV with FFmpeg and GStreamer on Linux Debian and on Ubuntu many times. I installed OpenCV with contribution and FFmpeg libraries on Windows as well many times. The Opencv GStreamer took me almost a whole weekend to let this work. It is not so difficult at all.
9) Open cmake/bin folder and start cmake-gui.exe
**10)**Add “where is the source code” as main /opencv-4.2.0 folder
**11)**Add “where to build the binaries” as new created /build folder
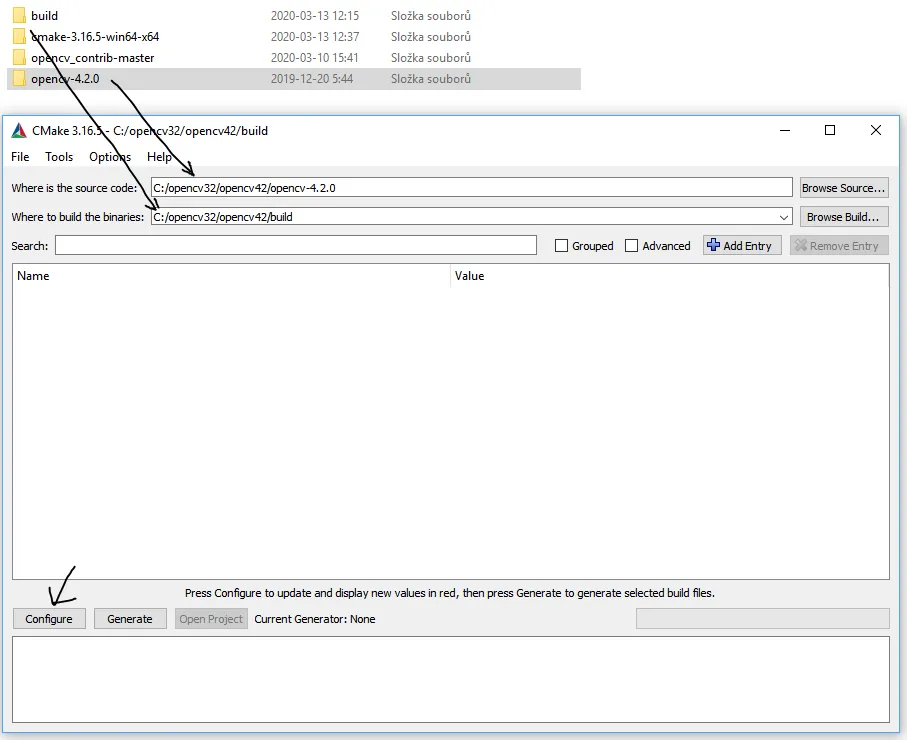
12) Hit configure button and select Visual Studio 2019
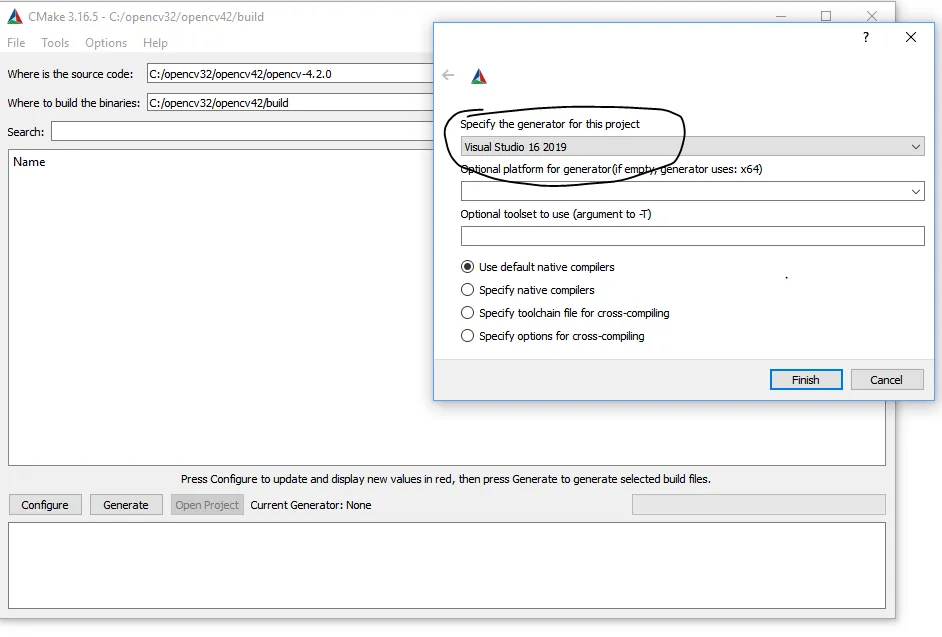
13) Wait for the end of configuration and ADD OENCV_EXTRA_MODULES_PATH
to point into /opencv_contrib-master/modules
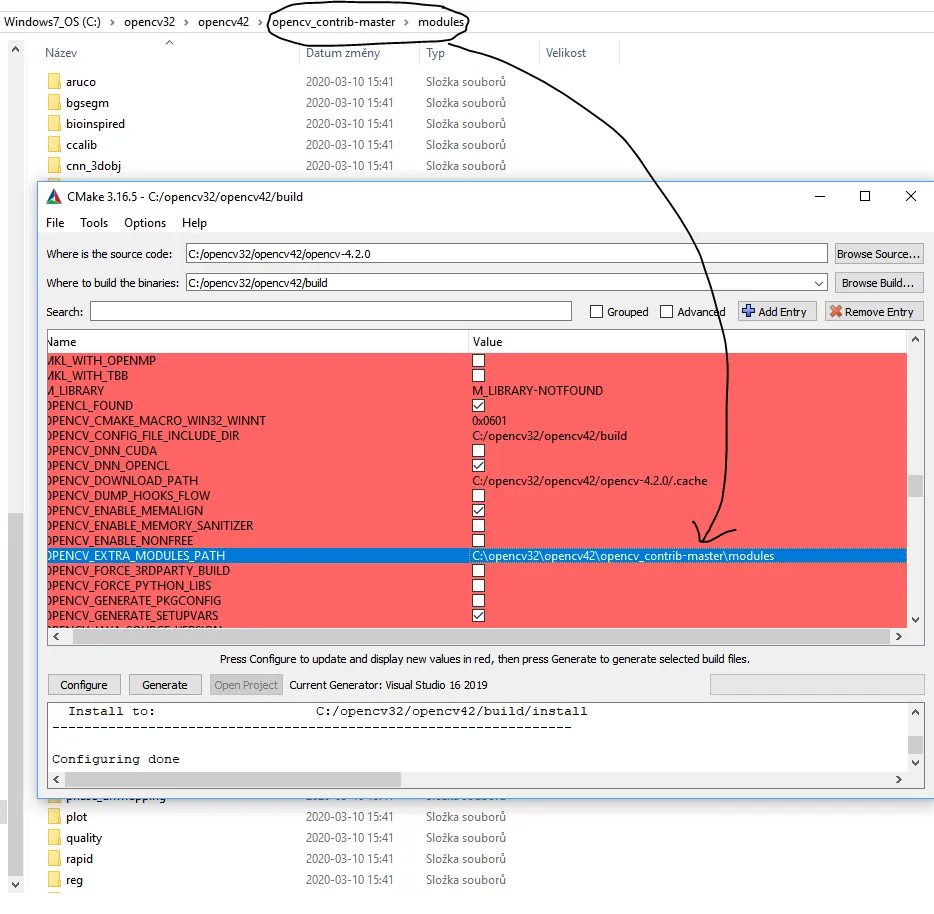
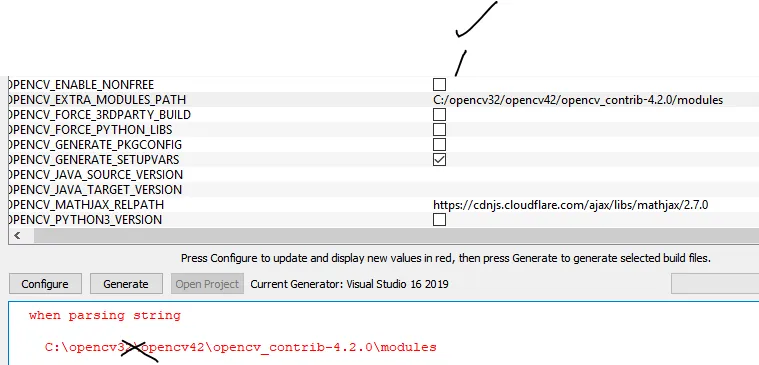
14) Lesson learned Correct the path of extra modules with this /
If you use path c:\opencv_contrib-master**\**modules the error message when parsing string problem will occur.
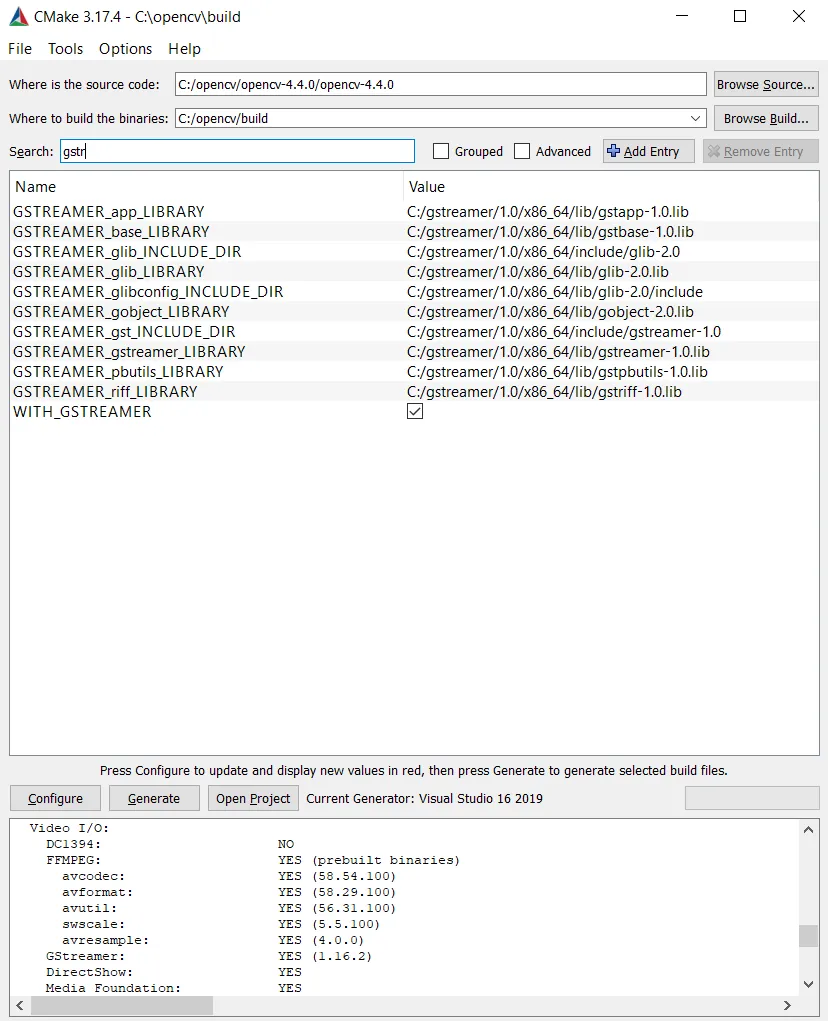
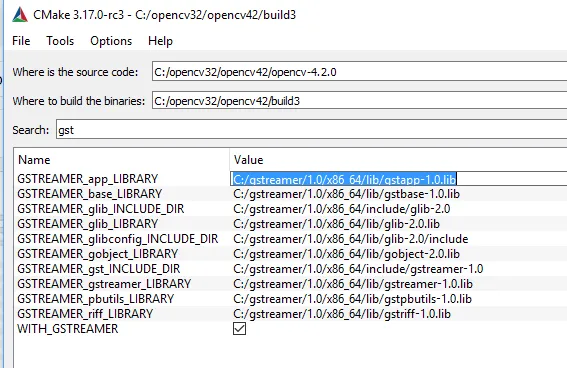
15) Set all GStreamer paths as follows:
Note: Some points directly to xx.lib which is important!! Some points in the header include the directory.
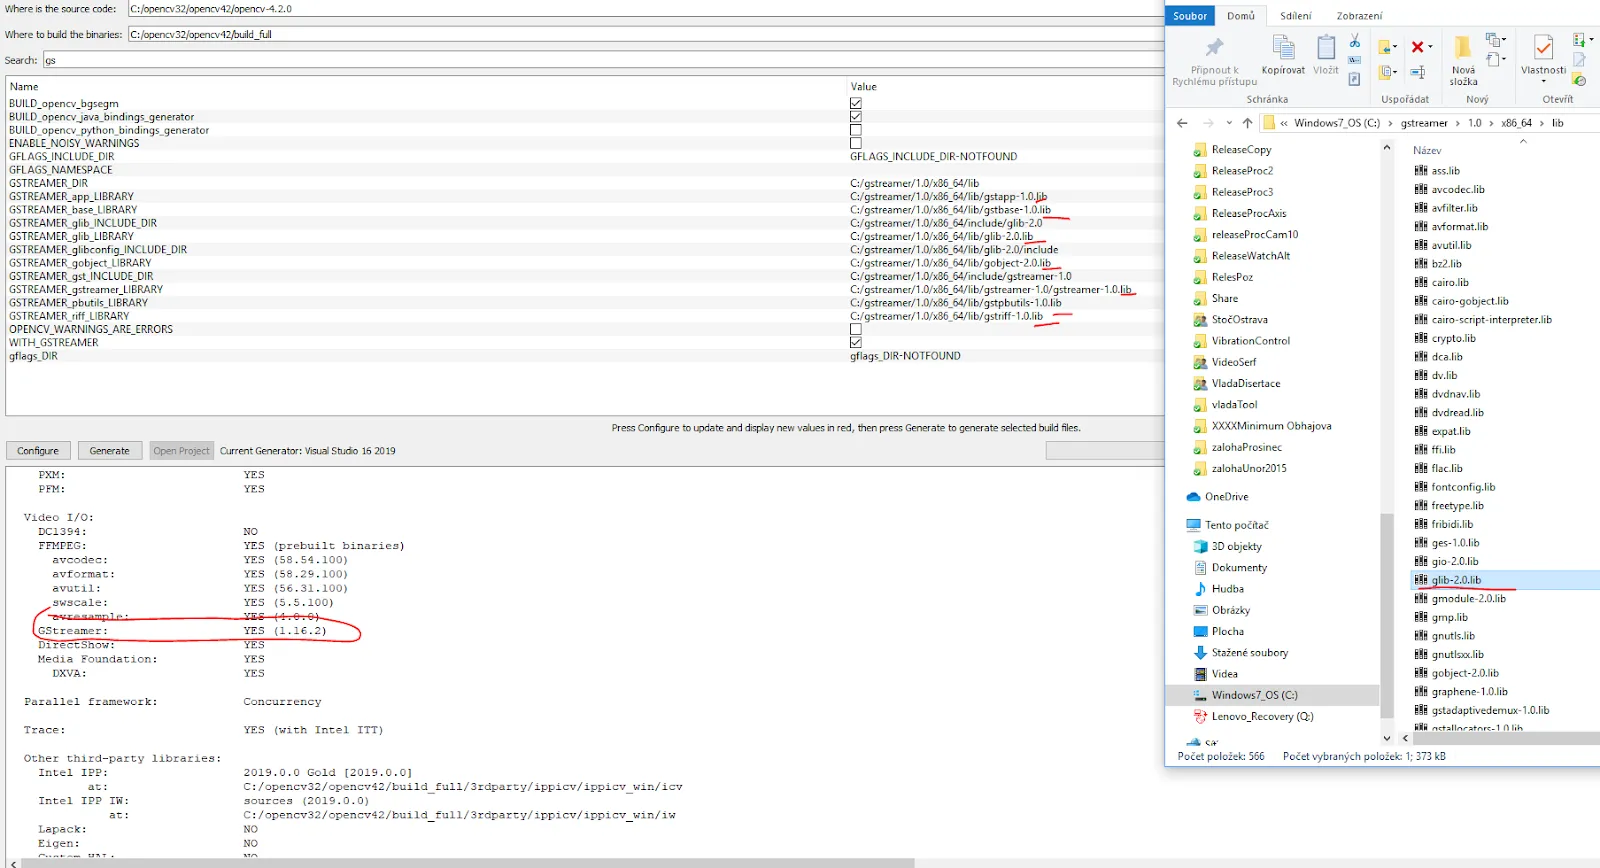
16) Hit Configure 17) Hit Generate if the configuration is OK 18) Open project if 16- 17 are DONE
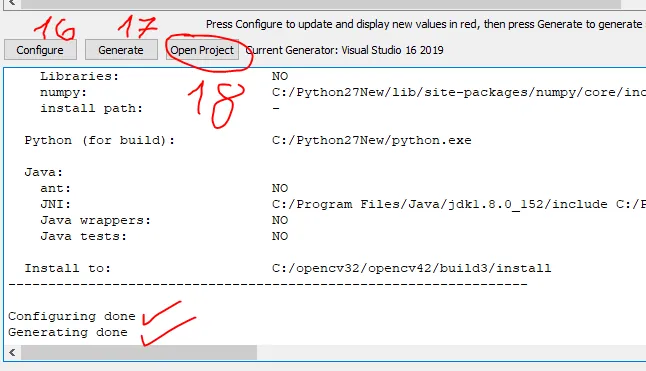
Build a Visual Studio Opencv project with GStreamer on Windows
19) Change project to Release and x64
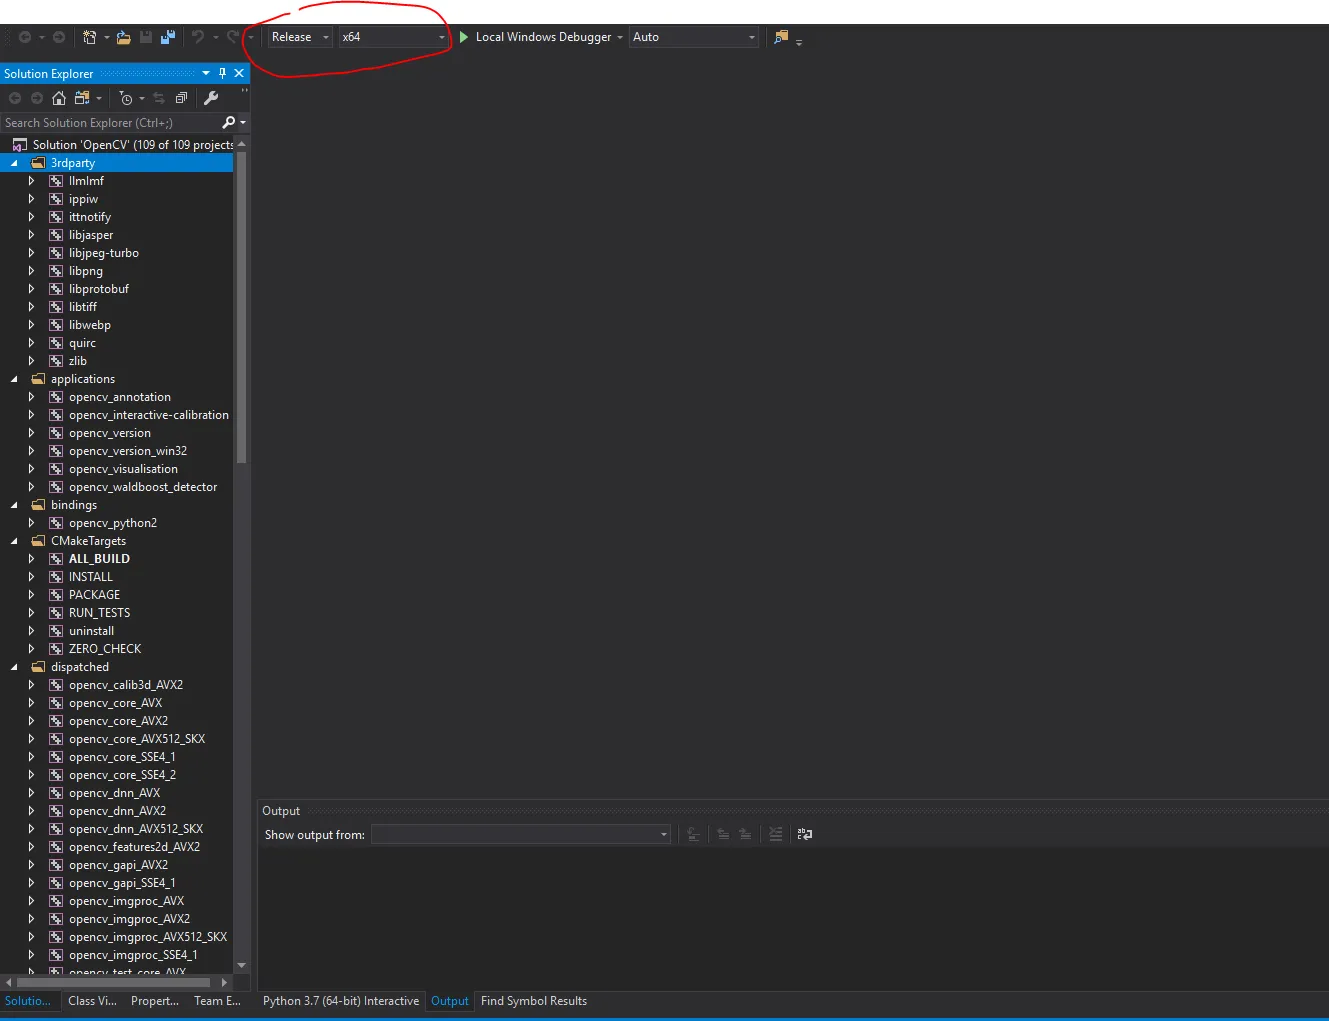
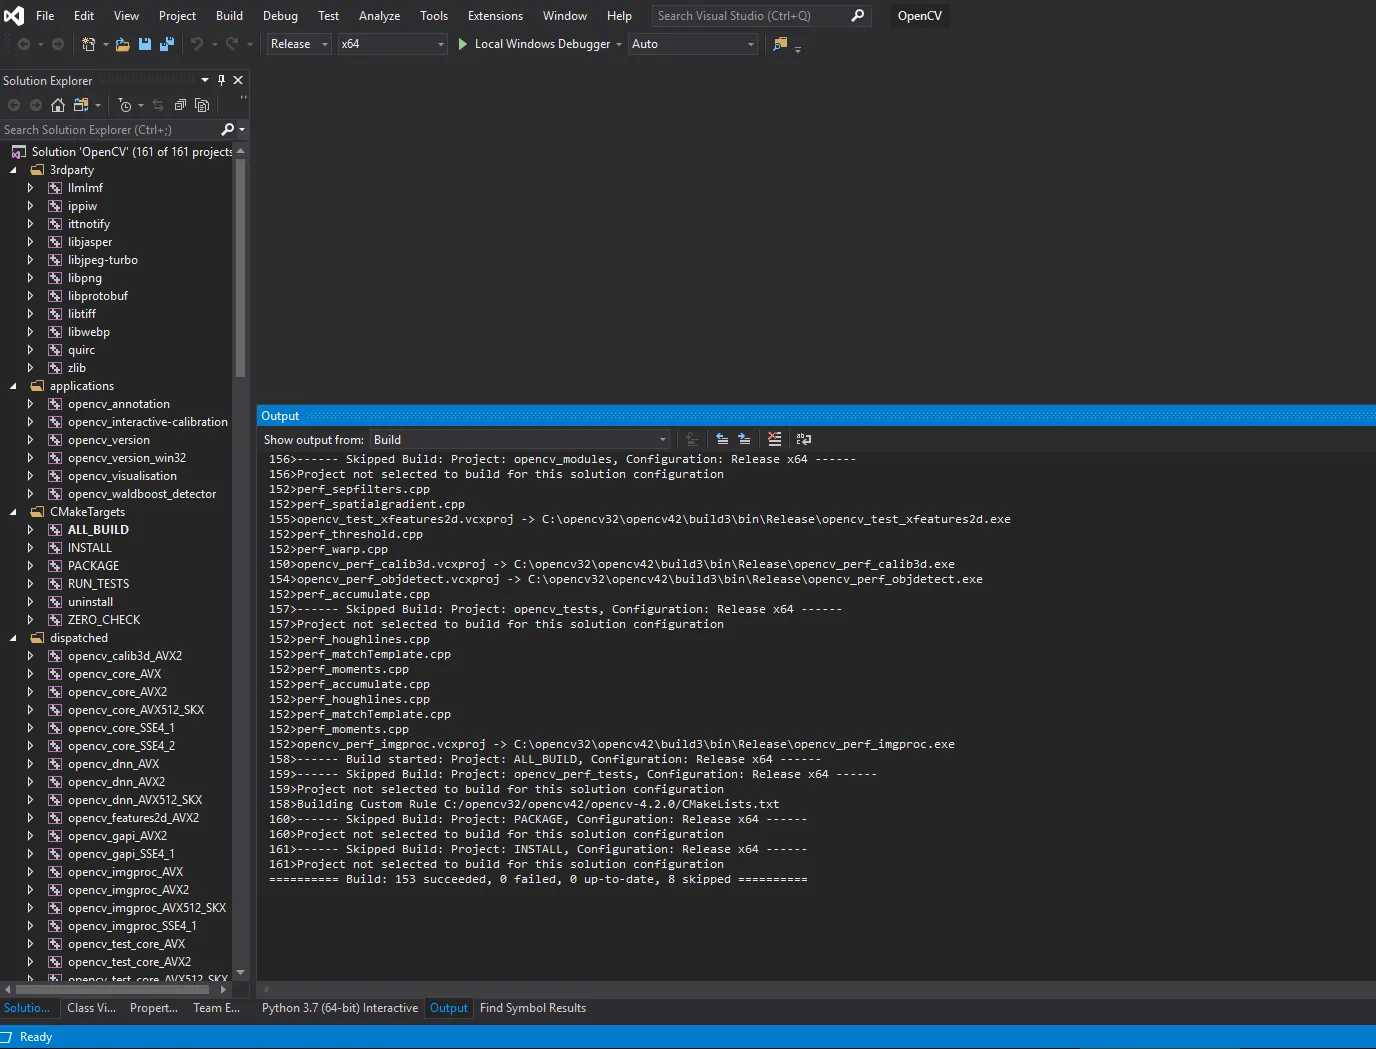
20) Right-click on whole solution and select build solution
21) After the solution is successfully built, install the solution by build just INSTALL in the solution
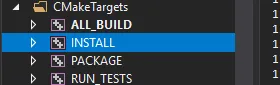
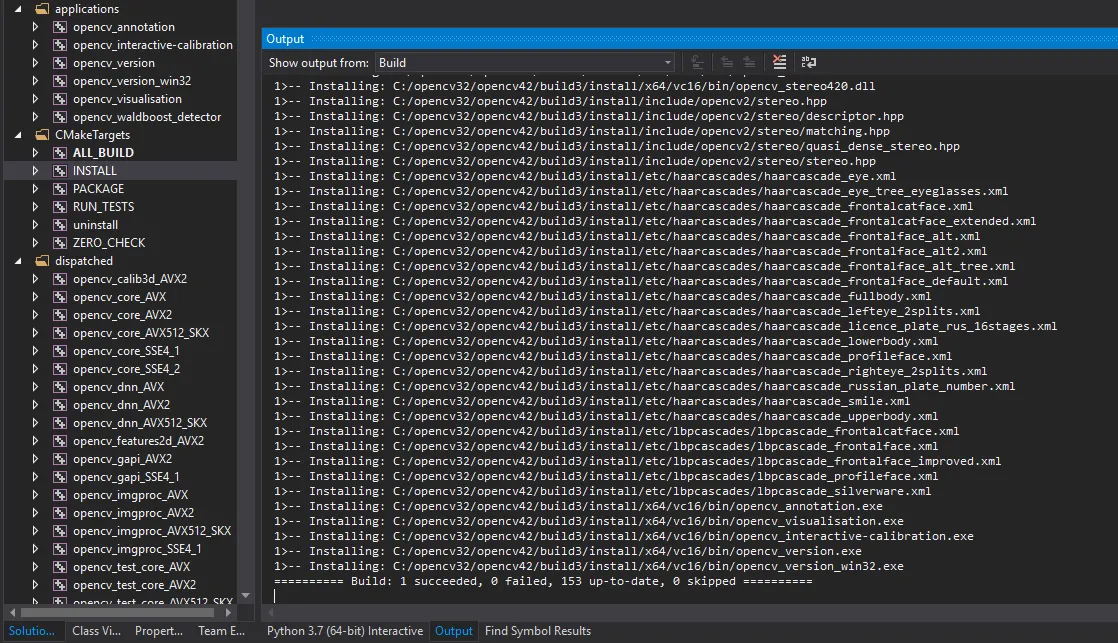
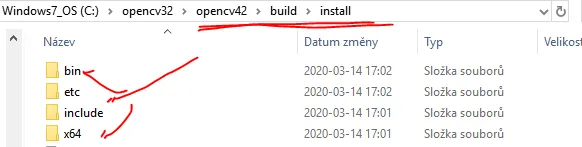
22) installation is done, The ready to use libraries and headers are located under build/install
Visual Studio 2019 Opencv with GStreamer configuration
24) Create a new C++ console application in Visual Studio 2019
25) Change the project to x64, I am using Release configuration.
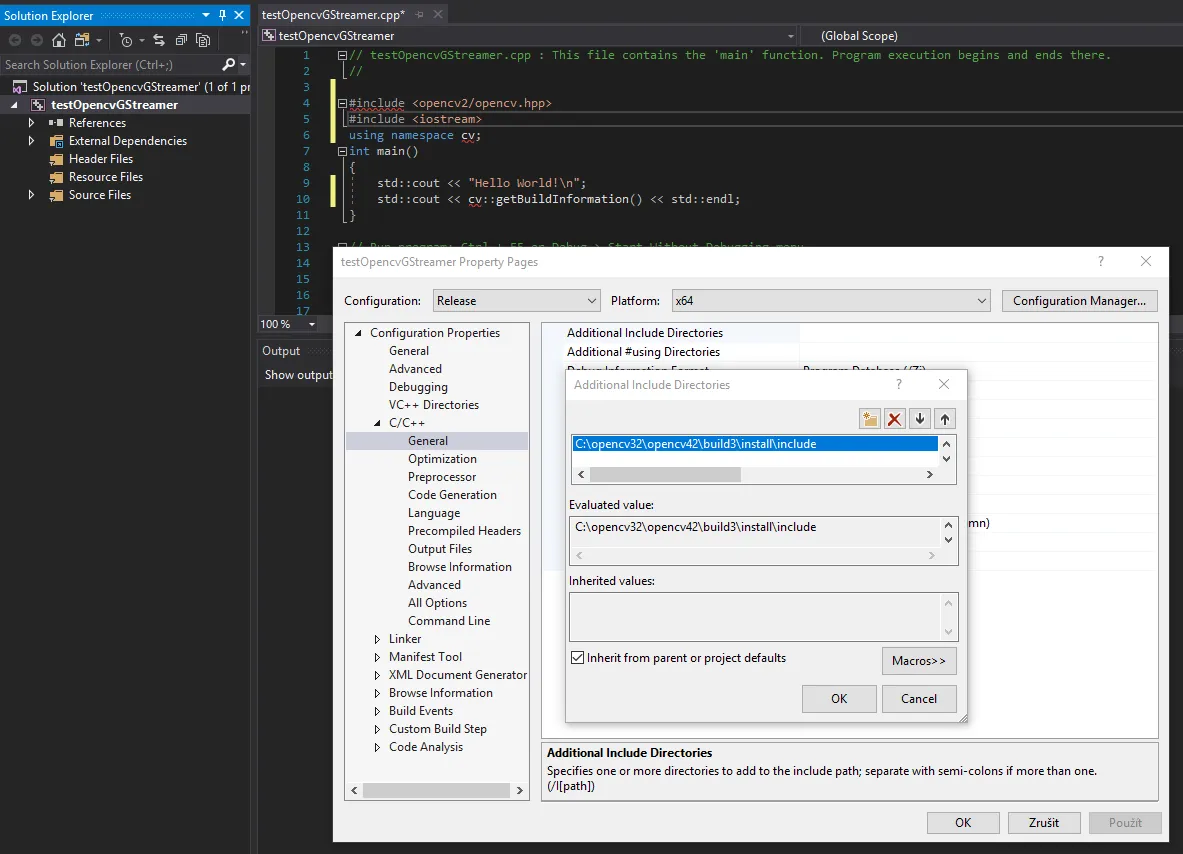
26) Open property of your project and set Additional include directory. This variable points into the include directory under install folder. (picture above)
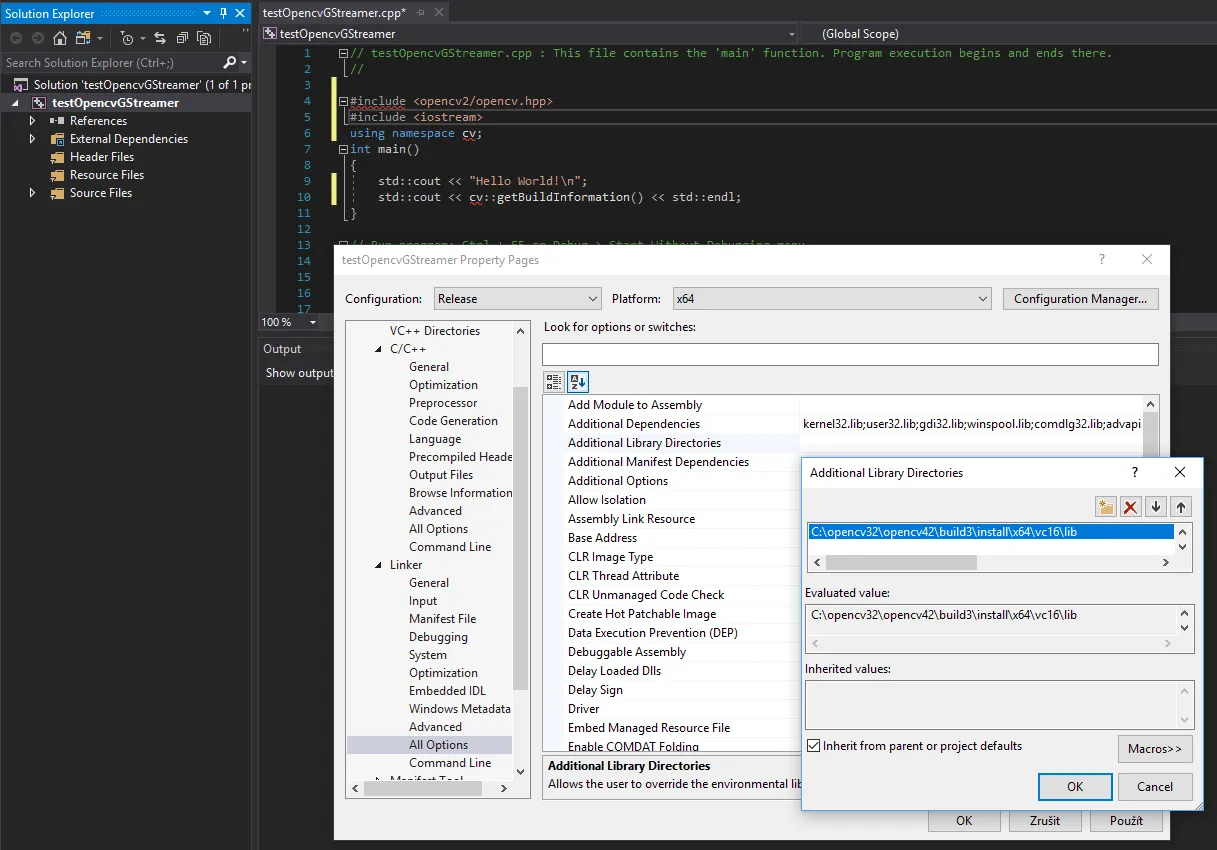
27) Under Linker- General- Additional Library Directories set- path to your install lib directory example c:\xxx\xxx\build3\install\x64\vc16\lib
 28) Under Linker-Input -Set Additional dependencies variable- Set names of OpenCV libraries as opencv_core420.lib
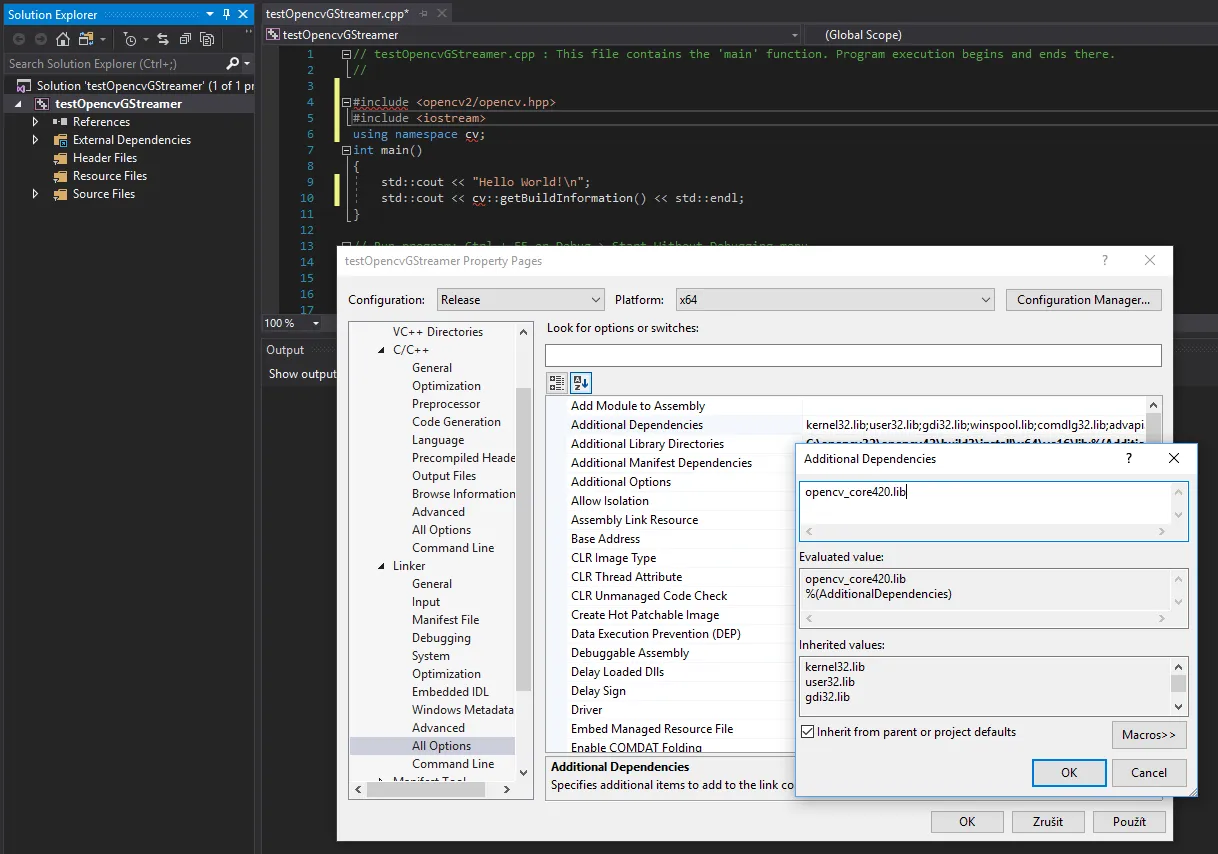 29) Copy opencv_core420.dll into your project next to testOpencvGstreamer.exe or set environment variables to find your OpenCV dlls.
30) Compile the project and with the expected result
29) Copy opencv_core420.dll into your project next to testOpencvGstreamer.exe or set environment variables to find your OpenCV dlls.
30) Compile the project and with the expected result
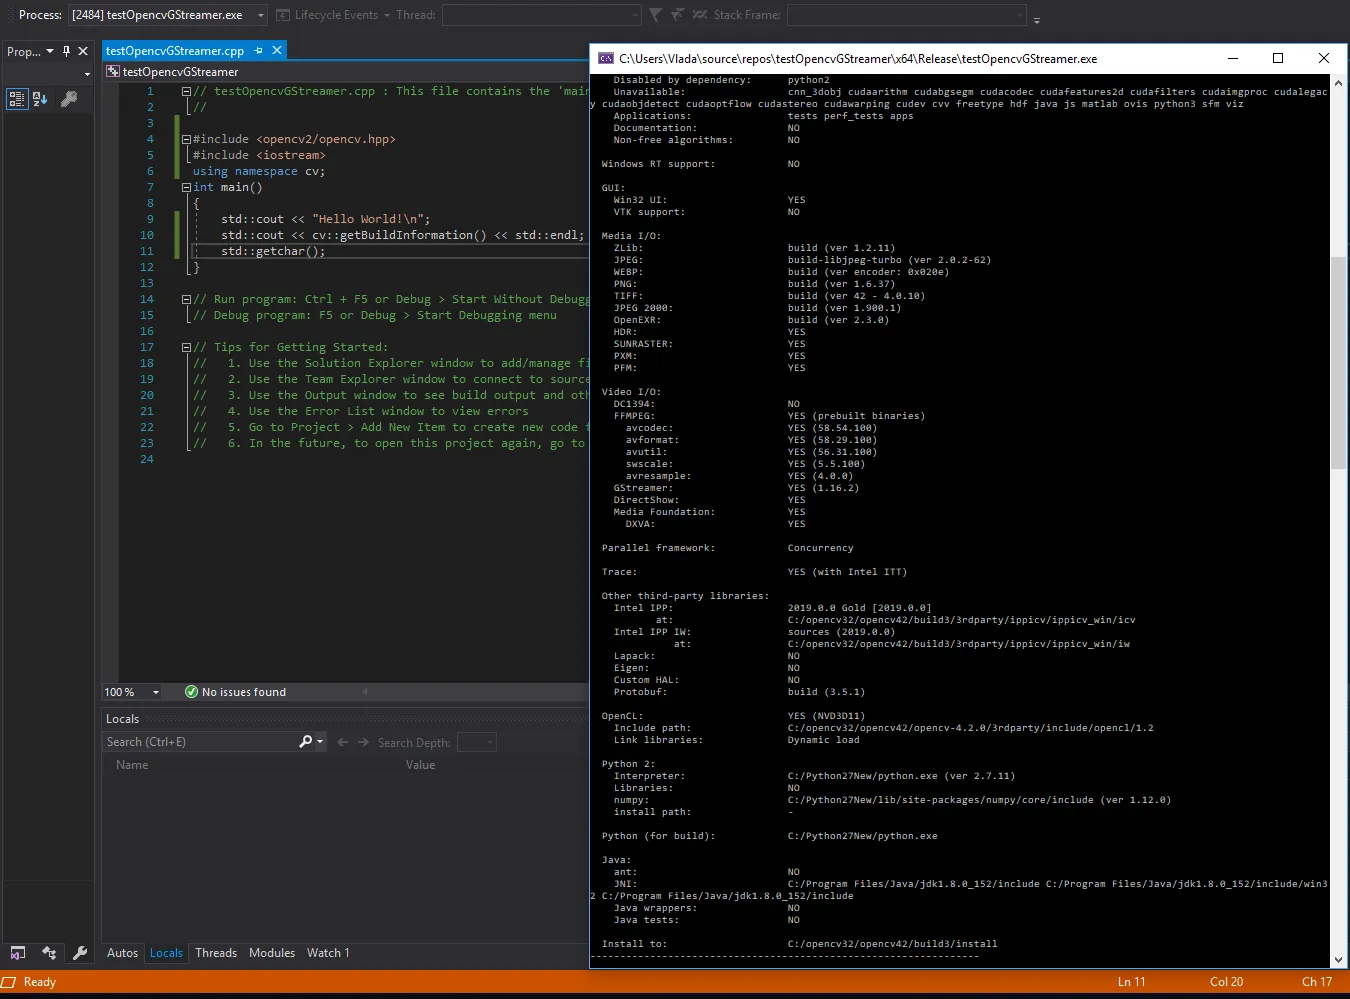
The next tutorial will be about the OpenCV GStreamer program example.
UPDATE OPENCV GStreamer
To use GStreamer you need to add path system environment variables to access GStreamer runtime as follows.
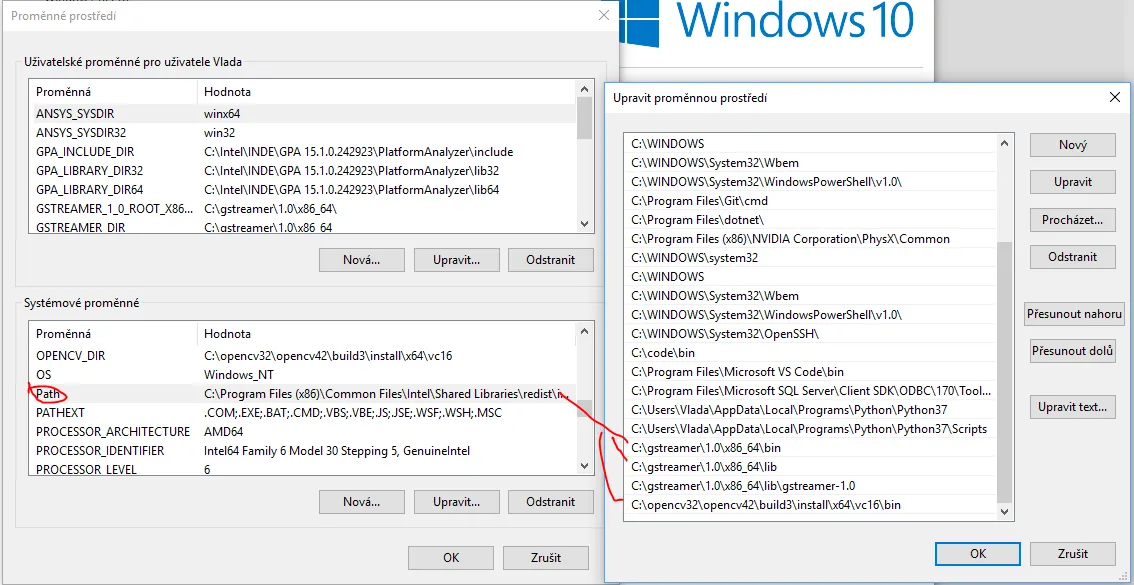
Opencv GStreamer YouTube tutorial for Visual Studio
YouTube tutorial build OpenCV from source with Gstreamer on Windows
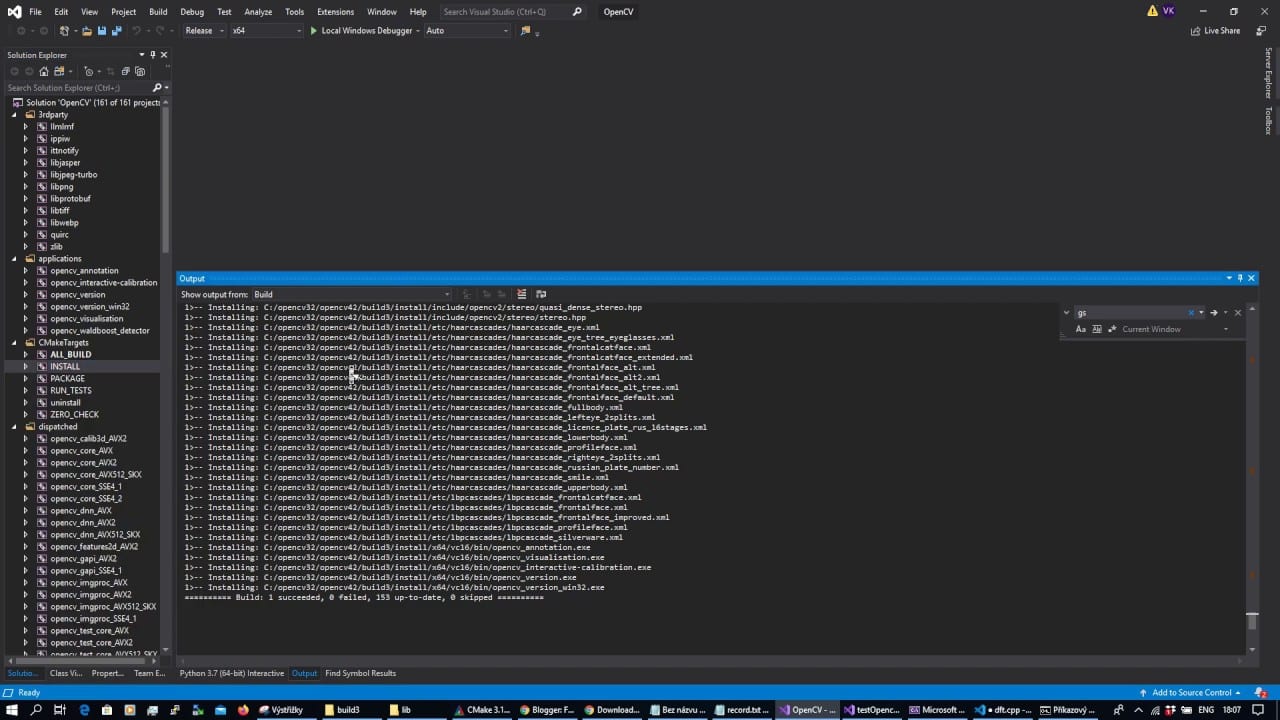
This will be a future tutorial on how to build the Opencv Gstreamer app on Windows.
Thanks for sharing: How to compile OpenCV with GStreamer on Windows Visual Studio
Opencv 4.4 Gstreamer
https://funvision.blogspot.com/2020/08/compile-opencv-4-with-cuda-and.html