Opencv tutorial on how to build OpenCV from source in Visual Studio 2015. This is useful when the new version has just been released and there is no prebuild library available. If you download prebuild libs for Windows Visual Studio times again there is a problem with the newest VS just mussing. Let’s check the version of libraries and VS.
Prebuild libs are only for versions VC11 and VC12. This means Visual Studio 2012 and 2013.
This step helps you compile your own opencv libs for VC14 - Visual Studio 2015 Community edition.
Important !! Nowadays just use NUGET packages in Visual Studio and you can code in under 1 minute. here.
Prepare third-party libs for opencv
This step depends on your requirements. If you want Python lets install Python. But I can recommend installing the following parts.
- Intel © Threading Building Blocks (TBB)
- Intel © Integrated Performance Primitives (IPP)
- http://www.ffmpeg.org
Build opencv 3.0.0
Download Opencv 3.0.0 gold
-
Extract files folder into C:/opencv-3.0.0
-
Prepare Empty folder C:/opencv-build
Build your own OPENCV by CMAKE and VISUAL STUDIO.
Prepare Solution
- install CMAKE
CMake is an extensible, open-source system that manages the build process in an operating system. With this program, you generate a visual studio Opencv.sln solution file.
Choose windows installer
Windows (Win32 Installer) cmake-3.4.0-win32-x86.exe
Run Cmake
cmake-gui.exe
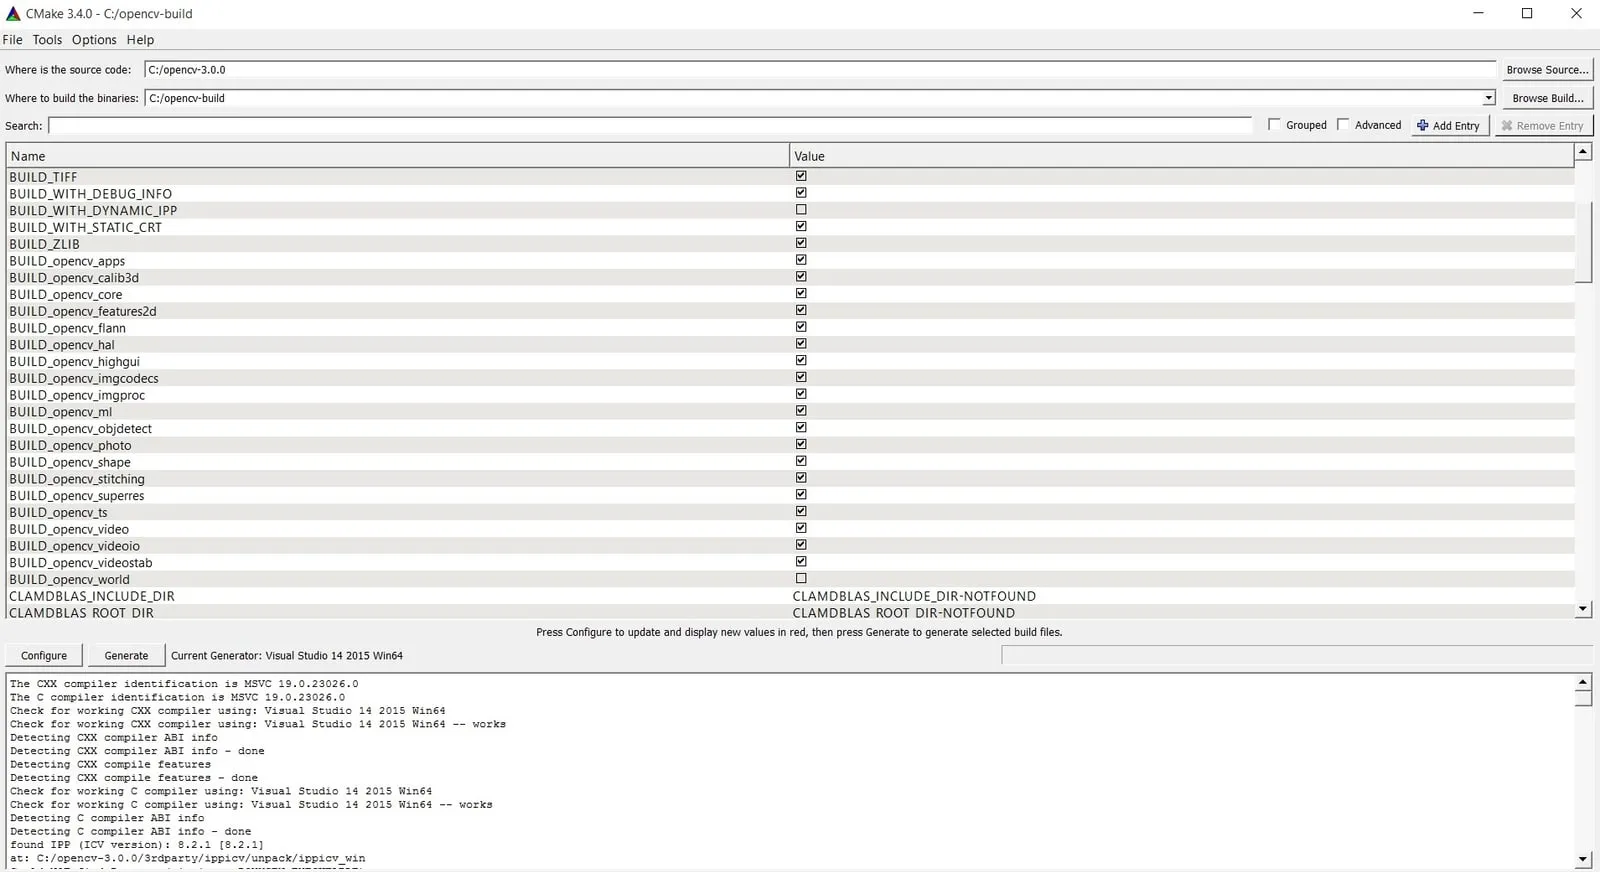
cmake-gui
Set field-
- Where is the source code? C:/opencv-3.0.0 (downloaded from git)
- Where to build the binaries C:/opencv-build (the empty folder you create)
Select configure button
- Choose Visual Studio 14 2015 Win64 bits of 32 as you like.
- I am using default native compiler options.
- Hit a Finish button
In the table name- Choose the components you want to install. Just try the default first,
Now press the Generate button an with,
This process takes some time and copies files and generates a Visual Studio OpenCV.sln file in the C:/opencv-build folder.
Build and release Opencv 3.0.0 in Visual Studio 2015
- Open Visual Studio 2015
- By file-open-project choose OpenCV.sln in C:/opencv-build
- Visual Studio open this project structure.
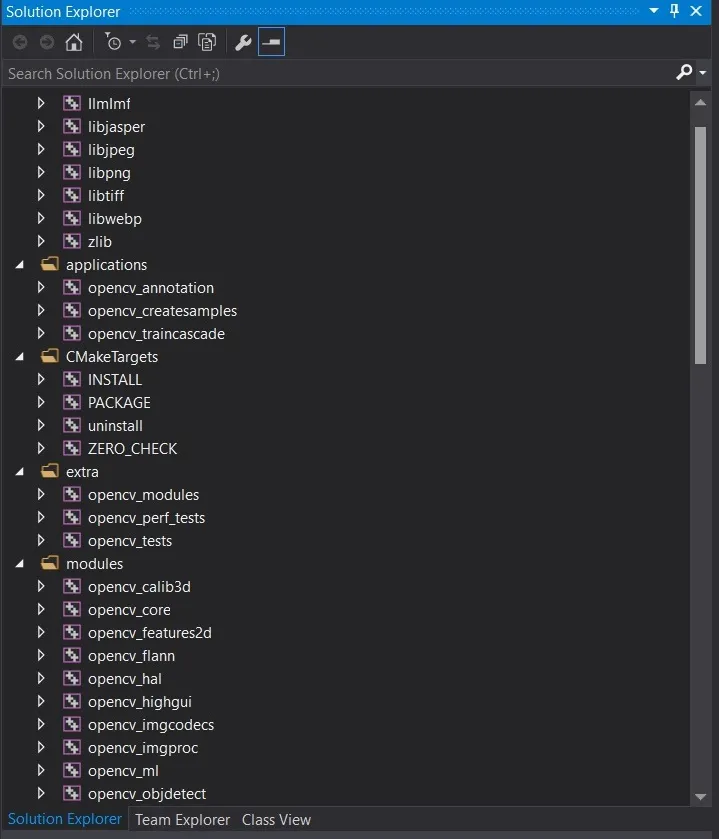
- Choose Debug and green start.
- After that choose Release and press green start.

This build and release process can generate some errors. Look at the details. All these errors in my case are in performance test parts.
- Ok Some errors but in test parts. I don’t care. Let’s install OpenCV.
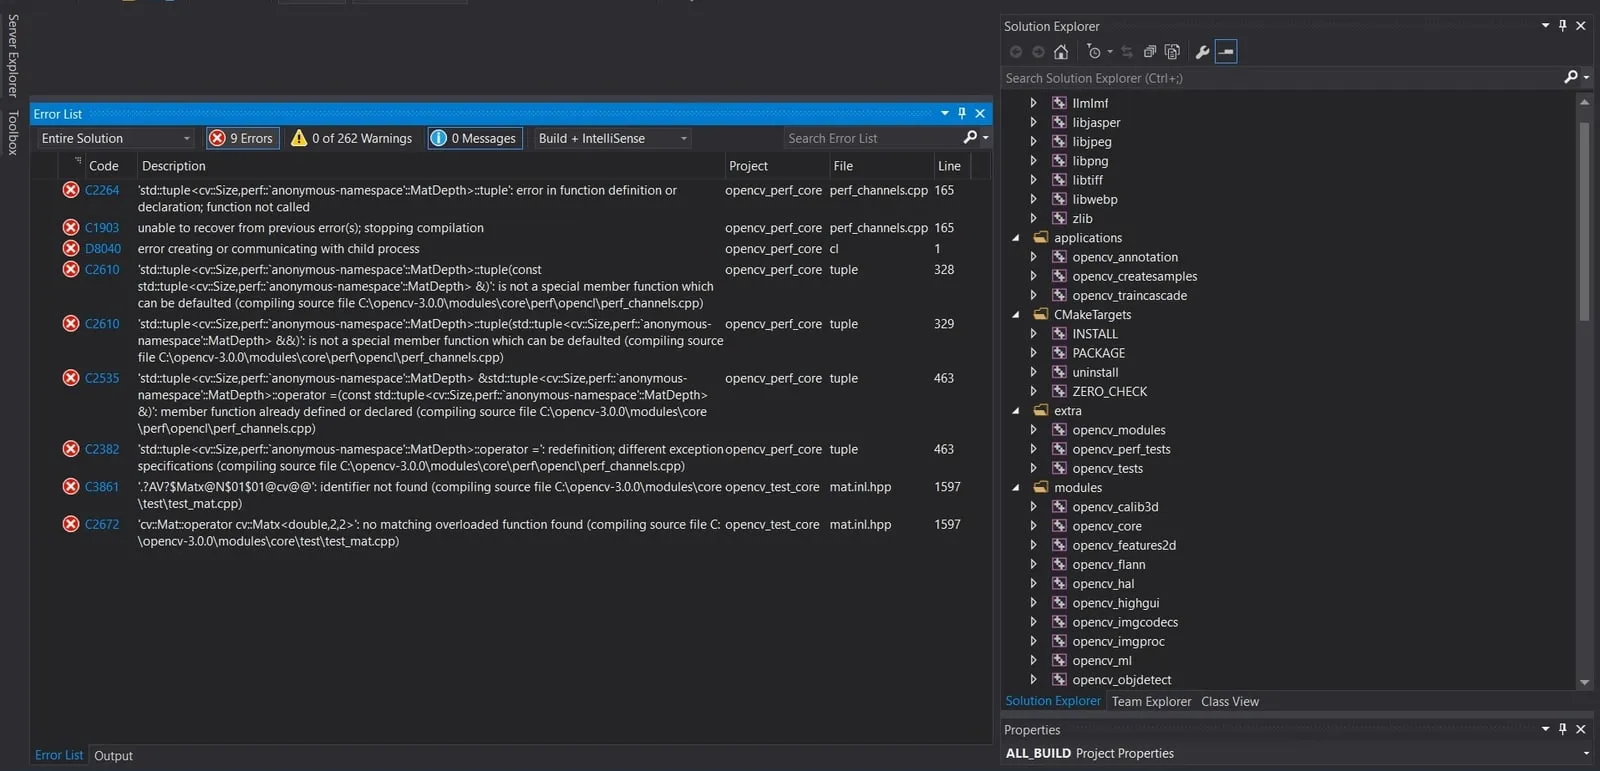
Install Opencv, Windows 7, Windows 10, Visual Studio 2015
Visual Studio 2015 64-bit version
In case you open your build folder before this step and you can’t find Opencv Libs and Headers.
You need to do the following.
- Choose an INSTALL project in the visual studio like in the picture.
- Build Release only this install project
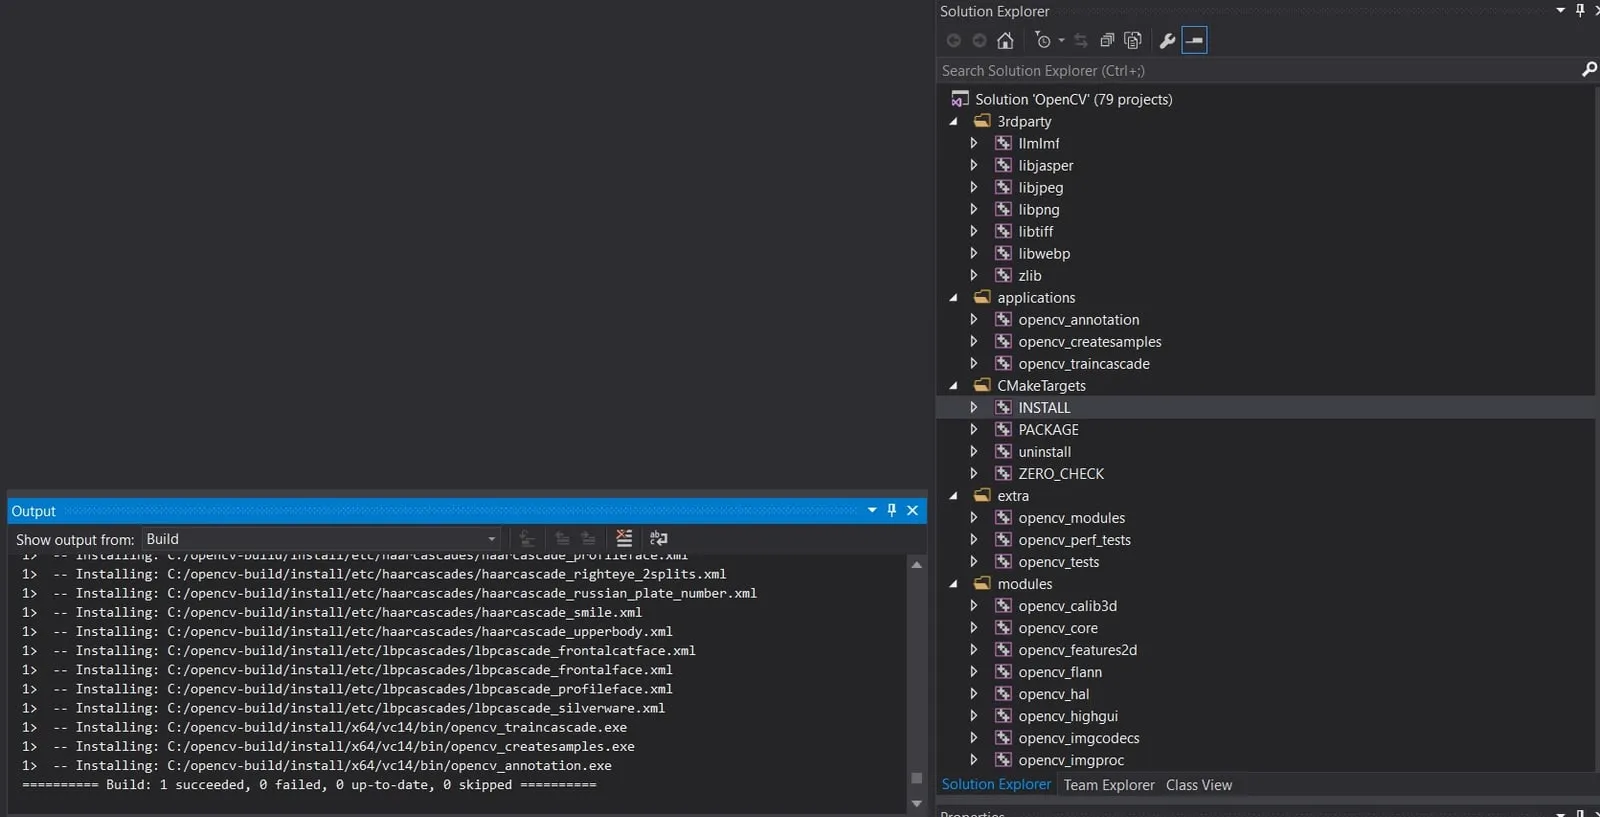
Install your project
The result is 1 successfully built solution and 0 failed as in the picture.
Your installation of opencv is c:/opencv-build/install
There is your header and libs for Visual Studio 2015.
I have got only the x64 version.
Test Opencv Visual Studio 2015
Include Project in Visual Studio.
Choose the Property pages of the project.
C\C++
General

     Additional Include Directory as C:\\opencv-build\\install\\include

     Additional #using Directory as C:\\opencv-build\\install\\include
Linker
  General

     Additional Library Directories as C:\\opencv-build\\install\\x64\\vc14\\lib
Linker
   Input

      Additional Dependencies add some libs like

     opencv\_core300.lib

     opencv\_highgui300.lib

     opencv\_imgcodecs300.lib

     opencv\_imgproc300.lib
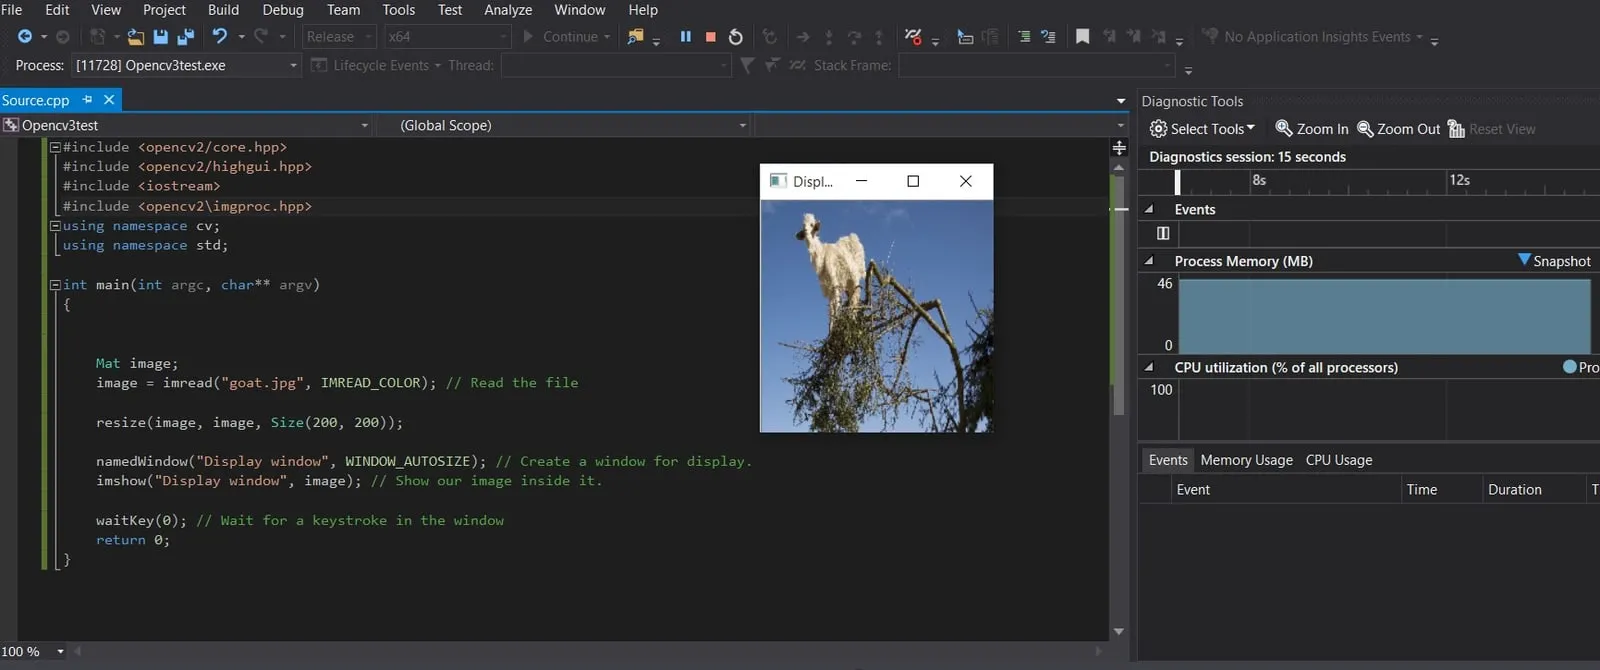
And you can build your Opencv program. You can copy mine from the image but choose your picture.